Tuesday, February 10, 2015

VMware Horizon View Admin dashboard for vCenter Server 5.1 displays the message: VC service is not working properly or Bad username or password

  • After upgrading to vCenter Server 5.1, in the VMware Horizon View Admin dashboard you see the message:

    VC service is not working properly

  • All other vCenter Server related functions fail, such as powering on and off VDI desktops, or recomposing, adding, or deleting linked clone desktops.
  • When you attempt to change or add (for new VDI environments) the vCenter Server user password or username using View Configuration > Servers > Virtual Center on the View Admin page, the attempt fails with the error:

    bad user name or password

  • Attempting to accept the vCenter Server certificate in the View Manager Administrator portal dashboard fails. You see the error: 

    Vmware View Cannot connect to the vCenter Server{0} because the user name or password is not valid

Solution #1

To resolve this issue, you must add the View domain to the Single Sign-On (SSO) default domain list in the vSphere Web Client.

Notes:
  • Both Single Sign-On and the Web Client services must be running on the vCenter Server machine.
  • Single Sign-On is a required program for vCenter Server and Web Client program must also be installed on the vCenter Server machine for the Web Client service to run.
  • VMware recommends that you run vCenter Server 5.1b (release 947939) or later to address any other possible issues.

To add the View domain to the Single Sign-On (SSO) default domain list:
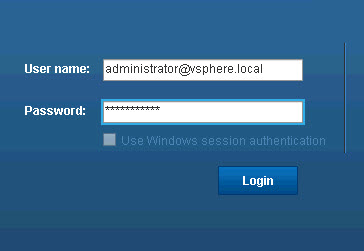
  1. Log in to the vCenter Server using the vSphere Web Client (https://FQDN_of_vCenter_Server:9443/vsphere-client) as an SSO administrator.

    Note: By default, the SSO administrator user is admin@system-domain and the password is set at the time of the Web Client install. To unlock or reset the vCenter SSO administrator password, see Unlocking and resetting the vCenter Single Sign-On administrator password (2034608).

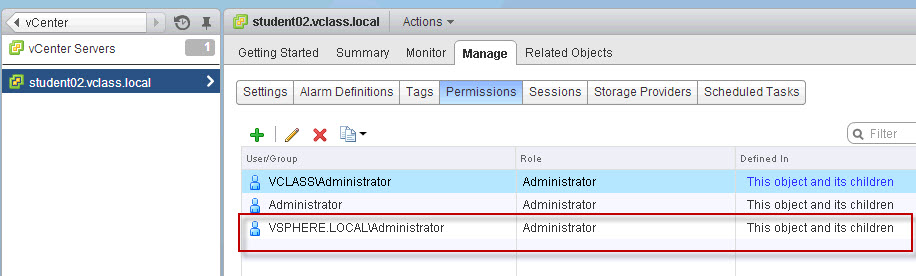
  2. In the home page, click Administration > Configuration (under Sign-on and Discovery).
  3. In the right side, click the line with the View domain.

    Note: If the View domain is not the same as the vCenter Server domain, you must add the View domain using the add icon at the top of the page.

  4. Add the View domain to the default domain list using the icon at the top of the page. After adding the View domain, it appears at the bottom of the list of default domains.
  5. Using the up arrow, move the View domain so that it is one above the system-domain entry.
  6. Click the save icon and log out of the page.
After completing these steps, the vCenter Server entry in the View Admin dashboard turns green and all vCenter Server related functions on the View Admin page return to normal, and the connection broker(s) are now able to communicate with this vCenter Server.

Solution #2

Go to the View Configuration > Servers > Virtual Center on the View Admin page, change the logon account to another domain admin account(With Domain Admin Privileges), set the password and verify. Once the account is verified and the status console shows that all services are green, go back and change the logon account to some other domain admin account if needed.

In our case, one of our Admins quit and we had to go around and change all domain service account passwords. Once we did this the connection from View to vCenter broke. Had we changed the view logon account to some other valid domain account prior to changing the existing account password, we could have avoided this issue. Once we changed the logon account we went back and used the original service account with the updated password and we were back in business!


Monday, February 9, 2015

How to log in to Single Sign ON SSO in vSphere 5.5 (URL)

I just installed vSphere 5.5 and my vCenter server was already in my domain and I expected to be able to log in with my domain administrator account. Unfortunately it was not the case. To solve the issue I wanted to log in with the vSphere Web Client to validate my permissions and that my domain vclass.local was an identity source. In vSphere 5.1 the SSO administrator was called admin@system-domain this is no longer the case. You need to log in with administrator@vsphere.local and the password you defined under installation of the SSO server. When I logged in with this user I was able to configure my domain as an identity source and give access to my domain admins access to vCenter Server.
You can access the vCenter Web Client on the following url:  

https://WEBCLIENTSERVER:9443/vsphere-client


SSO55


Another thing I noticed was that the administrator@vsphere.local was administrator on the vcenter. In 5.1 admin@system-domain did not have any vCenter permissions set.

vpsherelocal


The only place to configure the SSO is through the Web Client. When you log in with your vSphere Client in a 5.5 environment you will be presented with the following warning

loginwarning

Friday, February 6, 2015

How to change the IP Address of ESXi through the command line

Use VI to edit /etc/vmware/esx.conf or use the following command to manually view the IP address; 

~#esxcli network ip interface ipv4 get

This will give you the list of all VMkernel interfaces with their details (See screenshot below). Changing the IP address is just a matter of adding some parameters:

~#esxcli network ip interface ipv4 set -i vmk(?) -I 10.10.10.10 -N 255.255.255.0 -t static


In your situation you will need to replace “vmk(?)″ with the appropriate VMkernel NIC and change the IP details.

change ip address of esxi

How to disable ESXi firewall vis the command line

When you need to troubleshoot and you need to eliminiate the firewall as the possible cause just log onto the ESXi console and disable the firewall via the CLI.

Use the following command:
 
~#esxcli network firewall set --enabled false

This will disable it permanently.

Changing the load balancing policy in ESXi using CLI 5.1


To change the load balancing policy on an ESXi 5.x standard vSwitch, run this command:


esxcli network vswitch standard policy failover set -l iphash -v vSwitch0

for the portgroup, run this command:

esxcli network vswitch standard portgroup policy failover set -p "Management Network" -l "iphash"

 On ESXi 5.x,
  • To change the load balancing policy to a route based on the originating virtual port ID, run this command:

    esxcli network vswitch standard policy failover set -l portid -v vSwitch0

  • To change the load balancing policy to a route based on the MAC hash, run this command:esxcli network vswitch standard policy failover set -l mac -v vSwitch0

To Set the NIC teaming policy on a Virtual Switch on an ESXi 5.x

  • To list the current NIC teaming policy of a vSwitch, use the command:

    # esxcli network vswitch standard policy failover get -v vSwitch0
  • To set the NIC teaming policy of a vSwitch, use this command: 
# esxcli network vswitch standard policy failover set -l policy -v vSwitchX
For example, to set the NIC teaming policy of a vSwitch to IP hash:

# esxcli network vswitch standard policy failover set -l iphash -a uplink=vmnic0,vmnic4 -v vSwitch0
Note: Available Policy Options:
  • explicit = Use explicit failover order
  • portid = Route based upon port id (This is the Default setting)
  • mac = Source Based Upon MAC Hash
  • iphash = Source based up IP hash (This is only to be used in a etherchannel\Portchannel)