Monday, April 14, 2014

Deploying or recomposing View desktops fails when the parent virtual machine has CBT enabled (2032214)

  • In the /var/log/vmware/vpxa.log file on the ESXi host, you see entries similar to:
DISKLIB-CTK : Could not open tracking file. File open returned IO error 4.
DISKLIB-CTK : Could not open change tracking file "/vmfs/volumes/<UUID>/<parent vm name>-ctk.vmdk": Could not open/create change tracking file.
DISKLIB-LIB : Could not open change tracker /vmfs/volumes/<UUID>/<parent vm name>-ctk.vmdk: Could not open/create change tracking file.
DISKLIB-LIB : Failed to open '/vmfs/volumes/<UUID>/<parent vm name>-000002.vmdk' with flags 0x21e Could not open/create change tracking file (2108).
[NFC ERROR] NfcFileDskOpenDisk: Failed to open '/vmfs/volumes/<UUID>/<parent vm name>-000002.vmdk': Could not open/create change tracking file (2108).
[NFC ERROR] NfcFile_Open: Open failed:
[NFC ERROR] NfcFile_Clone: Failed to open source file
[VpxNfcClient] File transfer [ds:///vmfs/volumes/<UUID>/<parent vm name>-000002.vmdk-> ds:///vmfs/volumes/<UUID>/replica-<id>/replica-<id>.vmdk] failed.
[VpxNfcClient] NFC file error for file ds:///vmfs/volumes/<UUID>/<parent vm name>-000002.vmdk
[VpxNfcClient] Closing NFC connection to server


Resolution

To work around this issue, disable CBT on the parent virtual machine. Ensure that there are no snapshots on the parent virtual machine. For more information, see Consolidating snapshots in vSphere 5.x (2003638).

To disable CBT:
  1. Power off the virtual machine.
  2. Right-click the virtual machine and click Edit Settings.
  3. Click the Options tab.
  4. Click General under the Advanced section, then click Configuration Parameters
  5. Set the ctkEnabled parameter to false for the corresponding SCSI disk.
To prevent any third-party applications from enabling Change Tracking on the virtual machine:
  1. Open the .vmx file of the virtual machine using a text editor.
  2. Add this entry to the file:

    ctkDisallowed="true"

Thursday, April 10, 2014

Netapp VSC 4.1 Plugin vCenter - Optimization and Migration

One of my most frequently read articles is on how to use MBRAlign to align your virtual machine disks on Netapp storage. Well, after Netapp has released their new Virtual Storage Console (VSC4) the tedious task of using MBRAlign might be eased for some admins.

Optimization and Migration
The new VSC4 console for vSphere has a new tab called Optimization and Migration. Here you are able to scan all or some of your datastores to check the alignment of your virtual machines. The scan manager can even be set on a schedule so that changes to the datastore will be recognized.
VSC_Datastores_Scan

Once you have scanned your datastores you can go the the Virtual Machine Alignment section and see if your virtual machines are aligned.
VSC_Actually_Aligned2
What if your virtual machines are not aligned already? Netapp has a new way to align your virtual machines without having to take them offline.
 
Disclaimer: I’ve looked for documentation on exactly how this process works, but couldn’t find any.


Aligning Virtual Machines
Lets go through the process of aligning a misaligned virtual machine using VSC4.
First, we select the virtual machine that is misaligned and choose the migrate task. This opens the alignment wizard.

Choose your filer.
VSC_WIZ1

Next choose a datastore. If we already have a functionally aligned datastore with an offset that’s the same as your unaligned virtual machine’s offset, you can select an existing datastore. If you don’t have an existing datastore that will align with your vm, you’ll receive an error message like the one below. If that’s the case, create a new datastore from the wizard.
VSC_WIZ3

Choose the datastore type.
VSC_WIZ4

In our case we’ll create a new datastore.
VSC_WIZ5

Once the migration is complete you’ll see your virtual machine in a new datastore and it will be aligned. Notice how the virtual machine offset matches the name of the new datastore that was created. Offset 7 was put into the AlignedDatastore1_optimized_7 datastore.
VSC_FunctionallyAligned

Now you can rest easy, knowing that your virtual machines are not suffering performance issues due to unaligned disks, and no downtime was required to do so.

Wednesday, April 9, 2014

VDR - Cannot take a quiesced snapshot of Windows 2008 R2 virtual machine error -3960

* Backup applications, such as VMware Data Recovery, fail with the error:

Failed to create snapshot for <vmname>, error -3960 (cannot quiesce virtual machine)


====================Solution=============================================

This is not a VMware issue.

This issue occurs due to a known issue with VSS application snapshots and ESXi/ESX 4.1 and later.

To work around this issue, disable VSS application-based snapshots and revert back to file system quiesced snapshots.

Notes:

Option 1 - Disable VSS application quiescing using the vSphere Client:
  1. Power off the virtual machine.
  2. Log into vCenter Server or the ESXi/ESX host through the vSphere Client.
  3. Right-click the virtual machine and click Edit settings.
  4. Click the Options tab.
  5. Go to Advanced > General > Configuration Parameters.
  6. Add or modify the row disk.EnableUUID with the value FALSE.
  7. Click OK to save.
  8. Click OK to exit.
  9. Right-click the virtual machine and click Remove from Inventory to unregister the virtual machine from the vCenter Server inventory.
  10. Register the virtual machine back to vCenter Server. For more information, see Registering or adding a virtual machine to the inventory on vCenter Server or on an ESXi/ESX host (1006160).

    Note: If this change is done via the command line, use vim-cmd command to reload the vmx is enough to see the changes. For more information, see Reloading a vmx file without removing the Virtual machine from inventory (1026043).
  11. Power on the virtual machine.
Note: To configure the disk.EnableUUID parameter for VMware Data Protection (VDP), see the Resolution section in Backing up a Windows Server 2008 R2 virtual machine using VMware Data Protection 5.1 fails with the error: Execution Error: E10055:Failed to attach disk. (2035736).


Option 2 - Disable VSS application quiescing using VMware Tools:
  1. Open the C:\ProgramData\VMware\VMware Tools\Tools.conf file in a text editor, such as Notepad. If the file does not exist, create it.
  2. Add these lines to the file:

    [vmbackup]
    vss.disableAppQuiescing = true

  3. Save the file.
  4. Exit the editor.
  5. Restart the VMware Tools Service for the changes to take effect. Click Start > Run, type services.msc, and click OK.
  6. Right-click the VMware Tools Service and click Restart.

Tuesday, April 8, 2014

The 4 Most Common Misconfigurations with NetApp Deduplication

Misconfiguration #1 - Not turning on dedupe right away (or forgetting the -s or scan option)

As Dr. Dedupe pointed out in a recent blog, NetApp recommends dedupication on all VMware workloads. You may have noticed that if you use our Virtual Storage Console (VSC) plugin for vCenter that creation of a VMware datastore using the plugin results in dedupe being turned on. We recommend enabling dedupe right away for a number of reasons but here is the primary reason why;

Enabling dedupe on a NetApp volume (ASIS) starts the controller tracking the new blocks that are written to that volume. Then during the scheduled deduplication pass the controller looks at those new blocks and eliminates any duplicates. What if, however, you already had some VMs in the volume before you enabled deduplication? Unless you told the NetApp specifically to scan the existing data, those VMs are never examined or deduped! This results in the low dedupe results. The good news, this is a very easy fix. Simply start a 
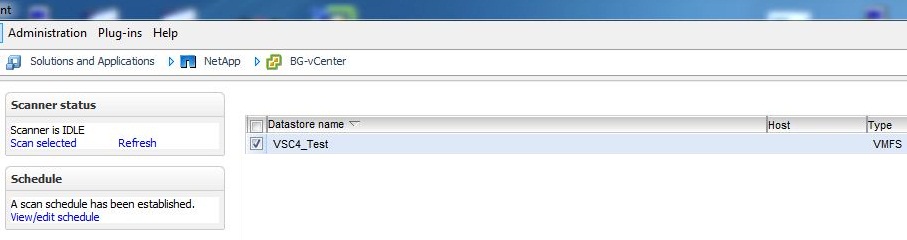
deduplication pass from the VSC with the “scan” option enabled or from the command line with the “-s” switch.

dedupmgmt1.pngAbove, where to enable a deduplication volume scan in VSC. Below, how to do one in Systems Manager;


dedupmgmt2.png
For you command line guys its "sis start -s /vol/myvol" note the -s, amazing what 2 characters can do!


This is by far is the most common mistake I come across but thanks to more customers provisioning their VMware storage with the free VSC plug-in it is becoming less common.


Misconfiguration #2 - LUN reservations

Thin Provisioning has gotten a bad reputation in the last few years. Storage admins who have been burned by thin provisioning in the past tend to get a bit reservation happy. On a NetApp controller we have multiple levels of reservations depending on your needs but with regard to VMware two stand out. First there is the volume reservation. This reserves space away from the large storage pool (the Aggregate) and insures whatever object you place into that volume has space. Inside the volume we now create the LUN for VMware. Again you can choose to reserve the space for the LUN which removes the space away from the available space in the volume. There are two problems with this. First, there is no need to do this. You have already reserved the space with the volume reservation, no need to reserve the space AGAIN with a LUN reservation. Second, the LUN reservation means that the unused space in the LUN will aways consume the space reserved. That is, a 600GB LUN with space reservation turned on will consume 600 GB of space with no data in it. Deduping a space reserved LUN will yeild you some space from the used data but any unused space will remain reserved.


For example say I had a 90GB LUN in a 100GB volume and the LUN was reserved. With no data in the LUN the volume will show 90GB used, the unused but reserved LUN. Now I place 37 GB of data in the LUN. The volume will still show 90GB used. No change. Next I dedupe that 37 GB and say it dedupes to 10GB. The volume will no report 63 GB used since I reclaimed 27GB from deduping. However when I remove the LUN reservation I can see the data is actually taking up only 10GB with the volume now reporting 90GB free. [I updated this section from my orginal post, Thanks to Svetlana for pointing out my error here]

In these occasions, a simple deselection of the LUN reservation reveals the actual savings from dedupe (yes this can be done live with the VMs running). Once the actual dedupe savings are displayed (likely back in that 60-70% range) we can adjust the size of the volume to suit the size of the actual data in the LUN (yes, this too can be done live)


dedupmgmt3.png

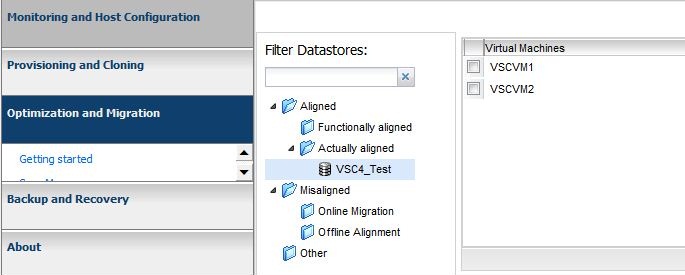
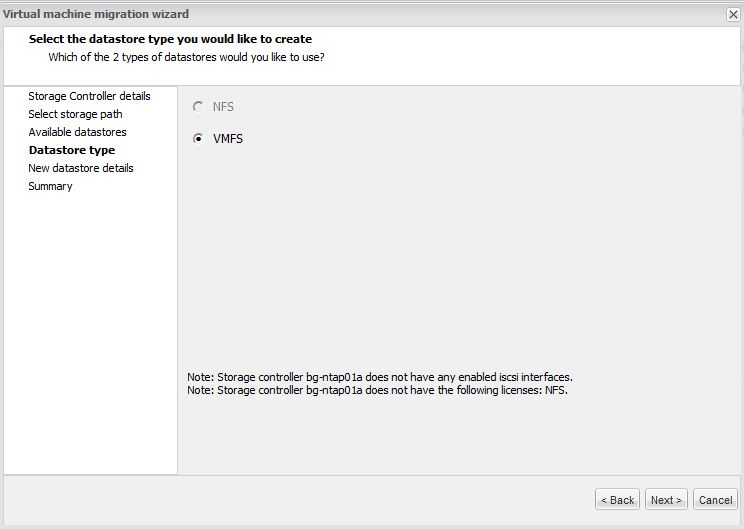
Misconfiguration #3 - Misaligned VMs

The problem with some guest operating systems being misaligned with the underlying storage architecture has been well documented. In some cases though this misalignment can cause lower than expect deduplication numbers. Clients are often surprised (I know I was) at how many blocks we can dedupe between unlike operating systems. That is, between say Windows 2003 and 2008 or Windows XP and 2003. However if the starting offset of one of the OS types is different that the starting offset of the other then almost none of the blocks will align.

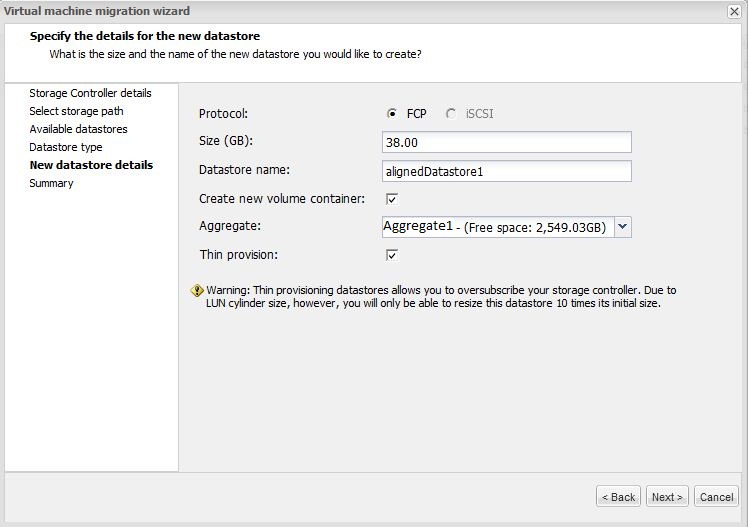
In addition to lowing your dedupe savings and using more disk space that required, misalignment can also place more load on your storage controller (any storage controller, not a NetApp specific problem). Thus it is a great idea to 
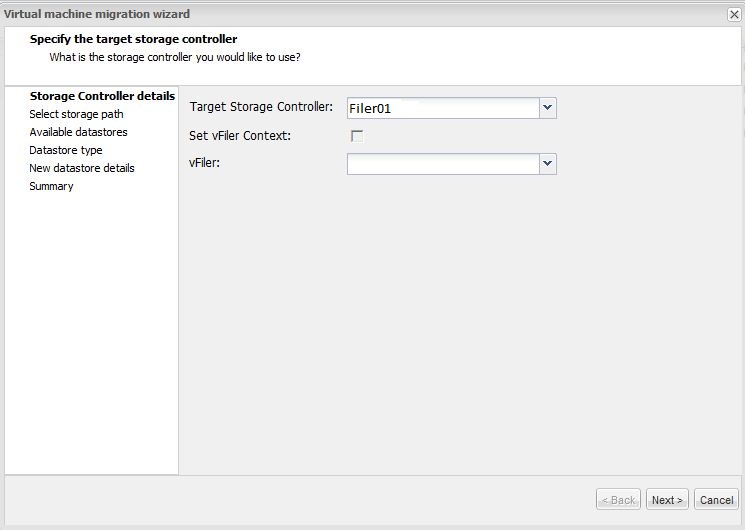
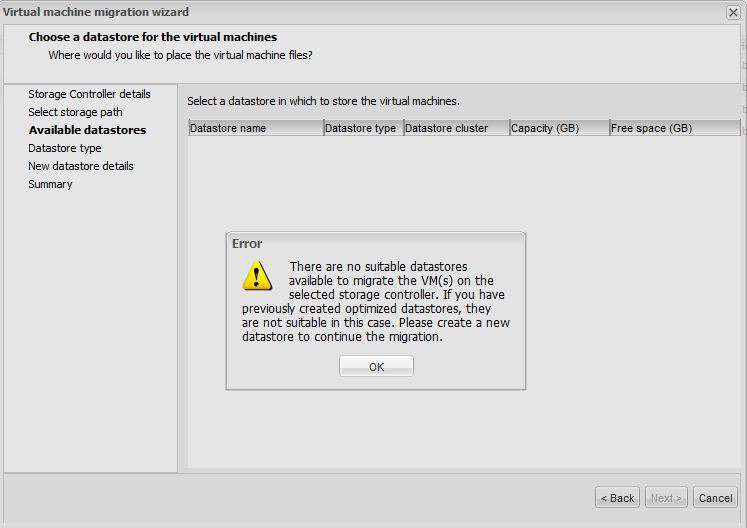
fix this situation. There are a number of tools on the market that can correct this situation including the MBRalign tool which is free for NetApp customers and included as part of the VSC. As you align the misaligned VMs, you will see your dedupe savings rise and your controller load decrease. Goodness!


Misconfiguration #4 - Large amounts of data in the VMs

Now this one isn’t really a misconfiguration, it's more of a design option. You see, most of my customers do not separate their data from their boot VMDK files. The simplicity  of having your entire VMs in a single folder is just too good to mess with. Customers are normally still able to achieve very high deduplication ratios even with the application data mixed in with the OS data blocks. Sometimes though customers have very large data files such as large database files, large image file repositories or large message datastores mixed in with the VM. These large data files tend not to deduplicate well and as such drive down the percentage seen. No harm is done though since the NetApp will deduplicate the all the OS and other data around these large sections. However the customer can also move these VMDKs off to other datastores which can then expose the higher dedupe ratios on the remaining application and OS data. Either option is fine.

So there it is, the 4 most common misconfigurations I see with deduplication on NetApp in the field. Please feel free to post and share your savings, we always love to hear from our customers directly.